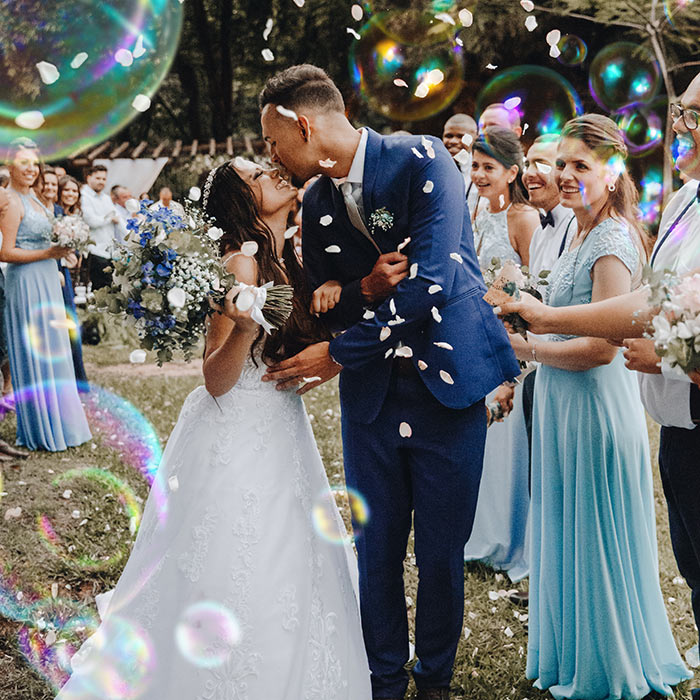

In this tutorial, we'll be taking a look at adding bubbles to your photos inside Photoshop CC and the various ways in which you can edit them to appear more realistic. The image below is what we'll be creating in this tutorial. Let's get started!

"Creating" The Bubble
The first thing you'll need is an image of a bubble. You can either shoot a picture yourself, or you can find many free ones on the internet if you search for "free bubble overlay." We went ahead and made one just for you so you don't even have to search. Right-click and tap save to download it to your computer.
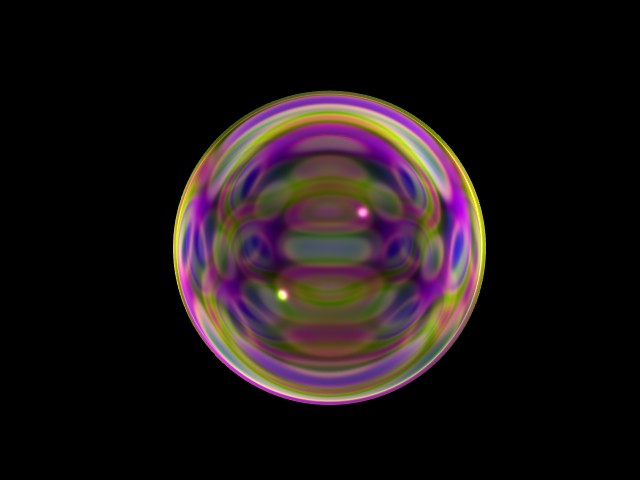
Note: This is from our bubble overlays package which you can get over on our store.
Applying the Bubble
Now that you got your image of a bubble, we're going to apply it. Start by opening the image then dragging and dropping the bubble onto the photo like so...

Resize and reposition to whatever you'd like.
Removing the Black Background
To remove the black and leave only the bubble visible, you'll need to set the blending mode to "screen." To set the blending mode, select it from the drop-down menu as shown in the image below.

From here, you may already be done! But maybe you'd like to add more bubbles with blur for a more realistic look.
Duplicating the Bubble
To add more bubbles around the image, we can simply duplicate the layer and reposition them. To duplicate the bubble, right-click it's layer then select Duplicate Layer. Do this however many times for how many bubbles you want.

Giving Depth and Realism
Now it's looking pretty good, but in reality, not all of those bubbles would be so clear. The further they are from the focus point, the more blur there would be, so let's fix that. To do this, we will add some blur. Go to Filter -> Blur -> Gaussian Blur and play around with the blur until it looks real. Something like this, for example...

That's it! You successfully added a bubble to your photo in Photoshop CC. Not too hard right? Feel free to share the images you edited using this tutorial. We'd love to see it.