

Intro
Layering in Photoshop is one of the many things that makes Photoshop great. The good news is that layers are super easy to use because Photoshop makes it so. So let's take a quick look at how to use the layers panel so you can become a pro in no time.
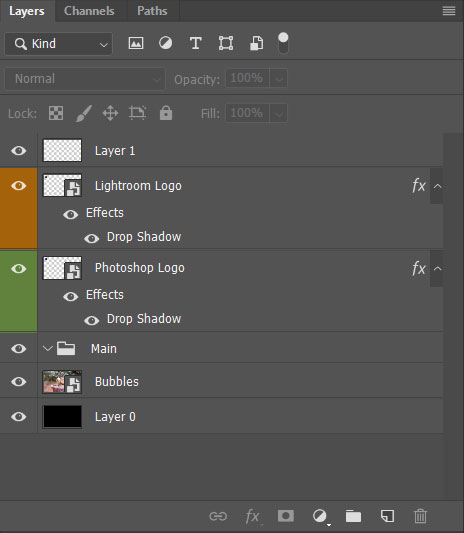
The first thing you'll need to know is what the layers panel looks like. See below:
Converting the Background Into a Layer
Maybe you don't want the background to be locked in place and static. So to convert the background into a layer, just click the lock icon. This will convert it into a regular layer where it will now be able to have transparency, layer masks, be able to reposition anywhere you'd like or change the stacking order.
Renaming Layers
Helpful for keeping your layers organized and tidy. Trust me, you want to do this! To rename a layer, double click on the title of the layer then type whatever you want. If you want to rename multiple layers, however, you can simply hit tab to move down the list and rename as you go. Note that you can not tab up, only down.

Adding a New Layer
Need to add more layers to your project? The first thing you should know is that new layers are always added above the current layer. You can drag it to the position you want after you've created it. To create the new layer without a dialogue box, hold shown Ctrl + Alt + Shift + N on Windows or Cmd + Option + Shift + N on Mac.
Deleting a Layer
Have too many layers? In order to delete a layer, you don't need to drag it to the trash. Instead, if a layer is currently selected, just tap the delete key on your keyboard for a much faster, easier way.
Duplicating a Layer
If you want to duplicate a layer, you can select multiple layers or just one and use the keyboard shortcut Ctrl + J on Windows or Cmd + J on Mac. You will notice, however, that the new layers are always set on top of the original layers. If you want a bit more control when duplicating, you can select the layers you wish to duplicate then hold down the Option or Alt key and then you can drag the layers to duplicate them and reposition them simultaneously. Pretty useful.
Changing the Blend Mode
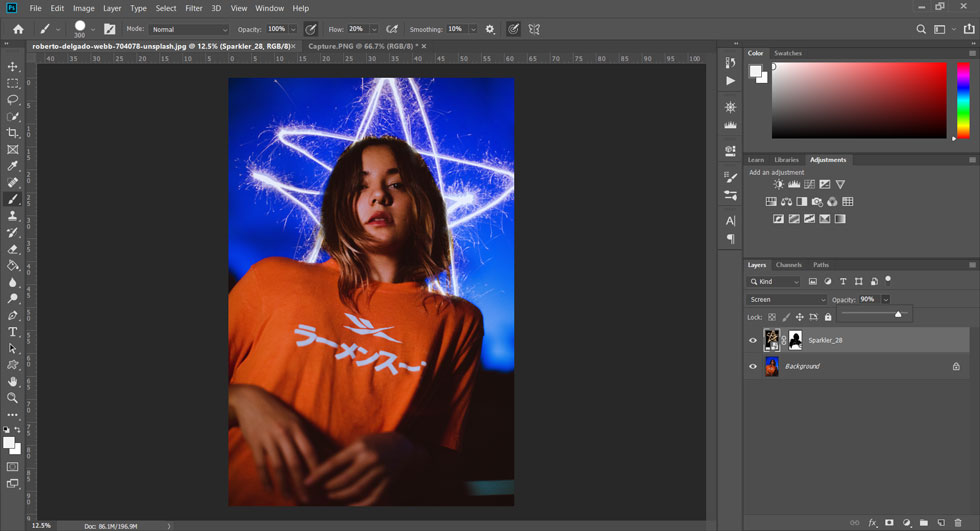
Blend modes change the way a layer reacts with the layer underneath it, and are necessary for using things like Photoshop overlays. To change the blending mode, you can select it from the list as shown below:

Alternatively, you could select the layer with the move tool and use the shortcut Shift+ to move down the list of modes or alternatively use Shift- to move up the list.
Changing the Opacity
Opacity, much like a blending mode can be changed by moving the slider as shown below:
You can also change the opacity in much the same way as the blending mode by selecting the move tool and tapping a number on your keyboard, for example, tapping 7 will set the opacity to 70%. If you type quickly, it will give you the exact amount that you entered. If you tap 0 it will set the opacity to 100% but if you tap 00 it will set it to 0%.
Toggling the Visibility
Sometimes you need to hide a layer to see what's going on or to preview something. Simply click the eye icon to the left of the layer you wish to hide temporarily. If you click it again, it will reappear. To hide multiple layers at the same time, select all the layers then use the shortcut "Ctrl + ," to hide them. You can use the same shortcut to make them visible again.
Organizing Your Layers
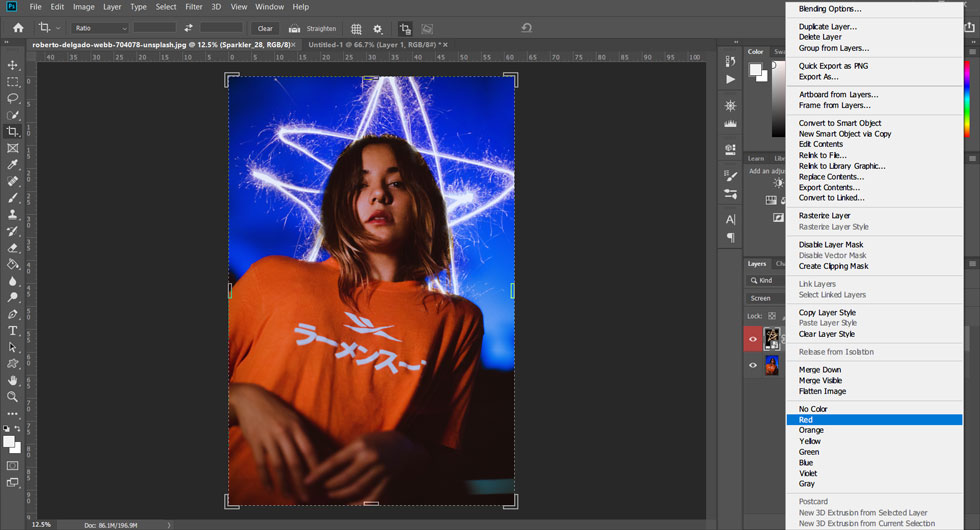
If you feel like your layers are getting a bit cluttered or confusing, you could always organize them with colour codes or folders. To add a colour code to a layer, right click on it then select one of the colours at the bottom of the list like so...
You could also add multiple layers (or one) into a folder for further organization. To add a layer into a folder, select the layers you wish then tap the folder icon at the bottom of the layers panel.
And there you have it! A quick and brief overview of layers in Photoshop CC. There is more you could know of course, but this should get you going.
Feel free to check out more free Photoshop tutorials over on our blog.